Side slip braking on skis. Plow braking on skis: step-by-step instructions. Managing your own body
Braking when going downhill is a necessary measure to reduce speed. Typically, cross-country skiers travel the course without braking. Braking has to be resorted to in the event of an unexpected obstacle, a fall of the competitor in front, interference from spectators, due to poor preparation of the track or an insufficient level of preparedness of the athlete.
Plow braking It is used on slopes of various steepness, on hiking trips and on walks. This is the most effective method, which allows you to significantly reduce speed on a slope or even stop, but it is rarely used in cross-country skiing - the strongest skiers practically do not use it.
Plow braking is performed as follows. When descending in the main stance, the skier springily straightens his legs at the knees and, slightly “throwing” his body up (relieving the pressure on the heels of the skis), with strong pressure, sliding the skis with his heels to the side. The skis rest on the inner ribs (edges of the skis), and their tips remain together; the knees are brought together, the body weight is distributed evenly on both skis, and the torso is slightly leaned back, and the arms take the position as when descending in the main stance. Increasing the angle of the skis and placing them more on the edges significantly increases braking.
Braking training is carried out according to the generally accepted scheme (story - demonstration - explanation), then students imitate movements in this method of braking. First, out of the blue, after showing and telling, schoolchildren take a working position several times (the “plow” position) and perform springy half-squats. The teacher checks the correctness of the accepted position. Then, on a moderately steep slope, students take turns braking, taking a position immediately after starting to move at the top of the mountain, and maintaining this position until the end of the descent or until they stop.
Having mastered uniform braking, you can move on to regulating the braking force by spreading or bringing the heels of the skis together. Next, they improve braking on the mountain, marked with landmarks that indicate the part of the slope traversed without braking, the place of its beginning, end or complete stop. By changing these distances, you can make the task more difficult or easier, depending on the preparedness of the students.
Then the students perform braking at the command of the teacher. Gradually, you can move on to improving braking on steeper slopes and on descents with changing terrain. When studying this method of braking, schoolchildren most often encounter the following:errors : crossing ski toes; skiing flat, not on the edges; uneven pressure on both skis, which leads to a change in direction of movement; insufficient spread of ski heels; knees are slightly bent and not brought together, etc.
To correct mistakes, take the “plow” position again several times on level ground. Further, “plow” braking is repeated and improved on slopes of varying steepness, with changing terrain and varying depths of snow cover. You should pay attention to firmly holding the skis in the “plow” position, especially the toes, in order to avoid them colliding with each other.
Stop braking
more often used when descending obliquely. The skier transfers his body weight to the upper (sliding straight) ski, and puts the lower one in the stop position: the heel is to the side, the toes are held together, the ski is edged on the inside edge. Increasing the angle of abduction and tilt of the ski increases braking. Throughout the entire braking, the body weight remains on the ski sliding straight (top), although a partial transfer of body weight to the ski that is in stop will lead to a change in the direction of movement, i.e. to turn with emphasis. This method is sometimes called “half-plough” braking.
Students who have mastered plow braking well usually easily master stop braking. When studying this method, you must first imitate the movements while standing still, taking the described positions several times. The learning methods and errors encountered when braking with a stop are similar to the errors encountered when braking with a plow. In the future, schoolchildren must master braking on slopes in both directions (from different legs).
Braking by side sliding (turning skis) used when the athlete needs to stop and go further down the slope, achieving lateral sliding by edging the skis.
Braking is performed as follows. When descending obliquely, the skier squats slightly, then straightens up with a rather sharp push forward, removing the load from the skis, placing them flatter and moving the heels of the skis to the side with a lateral movement of the ankle joints. This is helped by the counter rotational movement of the torso and shoulders, as well as additional support on the stick. After moving the backs of the skis to the side, the amount of braking force depends on the angle of the skis: for sharp braking or even a complete stop, you need to place the skis across the slope and steeply on the edge. To study side-slip braking, lead-in exercises are used to turn on parallel skis from a stop. When teaching girls this method of braking, it is necessary to avoid very steep slopes.
When driving down a slope at high speed and unexpectedly appearing obstacles, it sometimes becomes necessary to brake sharply or even stop. If the distance to the obstacle is too short, the only way to prevent a collision isdeliberate fall . A controlled fall will reduce the possibility of injury and allow you to quickly get up and continue moving. Before falling, you need to sit down and then fall (gently “falling”) back to the side - on your hip and on your side. At the same time, the skis should be turned across the slope. It is better to scatter your hands with sticks up the slope. From this position, sitting down and then leaning on poles, it is easy to get up and, turning your skis, continue moving down the slope.
If the skis are crossed when you fall, you need to turn over on your back, raise your legs up and bring the skis to their normal position. Then turn over on your side again (skis across the slope) and stand up. In exceptional cases, when braking with skis is impossible (on a hiking trip, on a walk - in deep snow cover), and a fall is impractical, skiers can use pole braking (one on the side, two on the side, two between the skis). These methods will help to slightly reduce the speed in case of unforeseen circumstances. In cross-country skiing, such braking methods are not used.
Send your good work in the knowledge base is simple. Use the form below
Students, graduate students, young scientists who use the knowledge base in their studies and work will be very grateful to you.
Posted on http://www.allbest.ru/
Introduction
1.3 Stages of ski training
2.2 Plow braking
2.3 Stop braking
2.5 Braking with sticks
2.6 Drop braking
Bibliography
Introduction
ski training preschooler coach
In most areas of our country, where the winter is long and snowy, skiing is one of the most accessible and widespread types of physical education.
Skiing in flat and rough terrain, overcoming ascents and descents of varying steepness, involves large muscle groups and has a positive effect on the development and strengthening of the functional systems of the body, primarily the cardiovascular, respiratory and nervous systems.
Physical activity during skiing is very easily dosed both in volume and intensity. This allows us to recommend skiing as a means of physical education for people of any age, gender, health status and level of physical fitness.
Performing moderate muscular work with the involvement of all major muscle groups in the movement in conditions of low temperatures, in clean frosty air, significantly increases the body's resistance to a wide variety of diseases and has a positive effect on overall performance.
Walking and skiing in beautiful wooded terrain with varied terrain brings great pleasure and aesthetic pleasure, has a positive effect on the nervous system, improves the general and emotional state of the body, and increases mental and physical performance.
The educational value of skiing is also extremely great. In all types of skiing activities - in lessons, in training, in competitions or just on walks - the most important moral and volitional qualities are successfully cultivated: courage and perseverance, discipline and hard work, the ability to endure any difficulties.
Chapter 1. Organization of skiing classes in the youth sports school in the initial training group
1.1 The influence of ski training on the body of a preschooler
Skiing has a great influence on the physical development and hardening of the child’s body. It involves almost all muscle groups in work, promotes vigorous metabolism in the body, enhances the functional activity of internal organs, develops muscle sensitivity, promotes the development of spatial orientation and coordination of movements, as children move on skis in conditions of constantly changing terrain.
Skiing causes active action of large muscle groups. A sweeping, wide range of movements, constant rhythmic alternation of muscle tension and relaxation contributes to the development of muscle strength. As the observations of doctors and teachers show, the more intense and varied the movements, the more actively the body functions. Teaching children to ski has a positive effect on the formation of the arch of the foot, and also has a beneficial effect on the formation of posture. Positive changes in improving posture are quite natural, since when skiing, almost all muscle groups, and especially the back muscles, harmoniously develop and strengthen. Under the influence of skiing, there is a significant development of basic movements (running, jumping, throwing). Thus, T.I. Osokina (1966), in her research, indicates that the length of the jump in six-year-old children who went skiing increases: for girls by 30%, for boys by 22%. And in children who have not skied, the jump length over the same period increases only by 16% for girls and 8% for boys. Approximately the same results are observed in other types of movements. Thus, teaching children to ski promotes the formation of motor skills in other types of movements. Physical activity during skiing is easily dosed within the widest limits, both in the nature of the impact and in volume and intensity. All this allows us to recommend skiing for preschool children, their health status and level of physical fitness.
Walking and skiing are among natural physical exercises that are close in coordination to the movements of walking and running. This explains the ease of mastering these exercises and their great health-improving effects.
Skiing is a so-called cyclic exercise; i.e. those that are characterized by repeated repetition of the same movements in the same sequence. For example, with an alternating two-step skiing stroke, the cycle of movements is a double step, during which dynamic muscular work occurs, associated with constant alternations of muscle tension and relaxation. This mode of muscle activity is most favorable for the child’s body and creates good conditions for its work and rest. Movements during skiing are characterized by large amplitudes, simplicity and dynamism, therefore they are favorable for the comprehensive development of the child’s muscular system.
Skiing contributes to the formation of correct posture and the comprehensive development of the muscular system of children, and has a positive effect on the strengthening and normal development of the spine. As a rule, in preschool age, postural disorders (stooping, drooping and protruding abdomen, shoulder asymmetry, etc.) are not yet persistent; they can be easily corrected. Therefore, the period of preschool childhood is favorable for preventing postural defects.
1.2 The health benefits of skiing
The effect of skiing on the body is extremely versatile. Just being in the clean frosty air in itself provides an inexhaustible supply of freshness and vigor. Physical movements in the air are the best way to increase metabolism in the body and have a beneficial effect on the nervous system. Hardening the body is the best medicine against flu, sore throat and other diseases. And from this point of view, skis are good companions of health (V. Ya. Dronov, 2005).
Skiing has great health-improving, educational and applied significance; it is an important part of the physical education system, having a wide-ranging impact on the body of those involved. Skiing is available at any age - from a very young age to old age. Walking and skiing involve various muscle groups and have a positive effect on the strengthening and development of the main body systems. All this ensures a high level of health and active longevity. At the same time, such diverse conditions for skiing determine comprehensive physical development and, first of all, the development of the most important physical qualities - endurance, strength, dexterity, etc.
When choosing physical exercises, it is necessary to take into account the characteristics of the child’s cardiovascular system, remember that its good functioning can be ensured by frequent breaks, rest or more dynamic work associated with alternating muscle tension and relaxation, which is not tiring for the child and creates favorable conditions for its cardiovascular system to endure significant physical activity for quite a long time.
With a certain degree of mastery of skiing skills, the correct mode of muscle work and breathing is established. Large muscle groups are involved in the activity, their work is performed with large amplitudes. This creates an economical mode of heart operation and has a beneficial effect on the gradual improvement of the cardiovascular activity of children.
Systematic outdoor activities, and in winter, thanks to the snow cover, it is much cleaner, and children breathe cold, clean and sufficiently humidified air, which has a beneficial effect on the development of the respiratory system. Thus, in the process of skiing, children’s respiratory muscles develop well, breathing is coordinated with movements, which is very valuable, since good functioning of the respiratory apparatus ensures the normal functioning of the child’s body.
As a result of systematic skiing in children, the mobility of the chest and the vital capacity of the lungs increase.
Hardening is one of the most important tasks of physical education at all ages, since it is the most important health measure that prevents diseases. As a result of hardening, metabolism improves throughout the body and the nervous system is strengthened. This leads to an increase in the body's performance, and in children, to a significant positive reflex stimulation of their growth and development.
It is extremely important to give your child the basics of hygiene knowledge by communicating the simplest rules and hygienic requirements for skiing:
You cannot sit down, much less lie down, in the snow even if you are very tired;
It is forbidden to use snow to quench your thirst;
It is unacceptable to take off your hat and unbutton it when it gets hot.
It is useful to remind your child of this before each ski trip.
Children cope with muscle load very individually, so it is important to take into account the physical fitness of each child when regulating the load and rest.
1.3 Stages of ski training
First of all, you need to teach your child how to stand on skis correctly, that is, instill the skill of keeping your feet parallel and maintaining the same distance between them when moving. It is very important that at first he does not get the impression that some kind of unpleasant weight has been placed on his feet. He should feel that skiing is an interesting activity and skiing is a pleasure. The most difficult thing is the first steps. Therefore, when you start skiing, it is best to first be towed along flat areas. If he falls, it’s no big deal, turn such failure into a joke. Explain that you need to fall neither forward nor backward, but only to the side. When the child is more or less confident on his skis, allow him to slide down a small, very gentle slide. But first, still support him with one hand.
It is necessary to repeat to the child that he should not walk, but glide on skis. If this doesn't work, suggest taking a few short steps first and then trying to slide. At the same time, be sure to support his hand. It is recommended to learn the sliding step on a well-knurled ski track with a slightly noticeable slope. It is best to start skiing yourself, then the training will be most effective.
The leg is placed forward, slightly bent at the knee. This is done to make it easier to transfer the weight of the body onto it after the push and to pull up the leg behind. You cannot lift your skis off the snow when moving: one leg is pulled towards the other (pushed forward) not by moving through the air, but only by sliding, with the knee slightly bent, then moved forward, etc. The first movements are carried out at a shortened step. When alternate sliding is mastered, you can switch to an extended step, but without the use of sticks. Hands should move freely, without tension. At the same time, the right arm is extended with the left leg, and the left arm is extended with the right leg.
The next stage is learning to turn. When turning by stepping, the leg is set back at a certain angle (in the direction of the turn), another is placed next to it so that a trace in the form of diverging rays remains on the snow. First teach turns at a small angle, then gradually increase it until you get a full circle.
When the child masters the technique of movement and turns, you can begin to teach him how to go up and down the slide. When descending, it is important to pay attention to the position of the torso. The body should be slightly tilted forward, the legs should be slightly bent at the knees, and the arms should be pulled back. They should not be waved. Do not rush to give sticks to your preschooler (otherwise the main load will fall on his still weak hands). The later he resorts to sticks (most advisable - after 7 years), the better the “style” of his movement will be. When using poles, it is important to ensure that they are not placed far from the skis - no further than the place where the skis begin to bend upward; so that they are carried forward in turn: with the left foot - the right ski and vice versa. You cannot hang on poles or use them to speed up movement: this will lead to fatigue.
The most important motor action of a skier is sliding, which is not present in the usual walking and running for a child. And you need to start learning with skiing, using poles only to maintain balance. And if the child manages without them, asks to take his hand, do not interfere, satisfy his desire. Do not pay attention to the straightened torso during movement, let everything be as in a child’s familiar and familiar walking, only with skis on his feet. At the same time, be sure to emphasize and interest the fact that you can easily move on skis even in deep snow. When teaching, do not forget that showing exercises is better perceived than explaining them.
Skis are selected according to the child’s height (length 100-130 cm). It is inconvenient to move on longer skis because they are heavy and much more difficult to control. Ski poles are selected so that their upper end reaches the arm extended to the side. Belt loops are attached to the upper ends of the sticks, which provide stable support for the hand on the stick when pushing off.
Children are taught to ski during morning and afternoon walks, increasing their duration from 25-30 to 45-60 minutes. For children six to seven years old, a ski trip can last 1-1.5 hours.
The training begins with showing the skier's stance (the position of the body while skiing). In this stance, the skis are held parallel, the legs are bent so that the knee is behind the level of the foot, the torso is slightly tilted forward, the arms are bent and lowered down. With preschoolers, it is useful to repeat this stance on every walk before starting skiing. The easiest way to move on skis is a walking step. This walking method is used on fluffy snow on level ground or when climbing a slope. Learning to move with a walking step begins without poles, with the toes of the skis lifted off the snow; the torso is slightly tilted forward, the right leg bends at the knee joint, rises up and moves forward. This makes it possible to slightly raise the toe part of the ski, pressing its rear end to the snow with your heel, take a step forward and transfer your body weight to your right foot. Then take a step with your left foot. The movements of the arms are coordinated with the movements of the legs, as in normal walking.
After one or two lessons, children are taught a sliding step. When performing it, the child glides first on one ski and then on the other, trying to take wide steps and fully straighten his legs at the knee joint. At the same time, the torso is tilted forward, its weight is transferred from one leg to the other. The arms move vigorously, as if walking. Having mastered the sliding step, preschoolers move on to learning the alternating two-step move with sticks, which consists of two sliding steps and two alternating push-offs with sticks. Place the stick in the snow at an acute angle near the toe of the forward leg and push off vigorously until the arm is fully straightened at the elbow joint. When performing it, the child glides first on one ski and then on the other, pushing off strongly with his feet and alternately with sticks.
Much attention is paid to teaching how to climb, descend and brake on gentle slopes. Beginner skiers perform all these movements without poles. They can only be given when the child is already confident on skis. There are the following lifting methods: “stepping step”, “half herringbone”, “herringbone” and “ladder”.
Children go down the slide in the basic stance: the torso is slightly tilted forward, the legs are bent, the arms are pulled back and bent at the elbows.
When learning to ski, a significant place is given to games. They provide an opportunity to improve skiing skills on flat terrain, perform descents, ascents and braking.
Along with skiing, the following exercises are used to develop a sense of skis, a sense of snow, mastery of skier-specific balance and coordination of movements in a single biomechanical system (skier - skis - poles):
Transferring body weight from one leg to the other without lifting the skis from the support;
Standing on two skis, lower yourself into a half-squat and then rise;
Alternately raising and lowering the toe and then the heel of the ski with a slight bend of both legs at the knee;
Raising the bent leg back and forth, first lifting the heel, then the toe of the ski;
Raising the bent leg forward with the ski positioned and held parallel to the ski track;
Jumping in place from foot to foot;
Jumping in place on two skis;
Small swings with a slightly bent leg back and forth;
Standing on your knees slightly bent and your torso slightly bent, alternately swing your straight arms forward (to eye level) and back (a little further than your hips);
A small lunge forward with the right, then the left leg;
Alternating lunge forward with a swing of either the left or the right hand forward and backward with different combinations of the work of the arms and legs;
Alternately swing the toes of the skis to the right and left;
Alternately lifting and moving the ski toes to the side;
Turn by stepping on the spot around the heels of the skis - the toes of the skis are alternately lifted and moved to the right or left, and the heels of the skis are not lifted off the snow;
Turn by stepping on the spot around the toes of the skis; when only the heels of the skis are lifted and moved to the right or left, and the toes remain in place;
Added steps to the side. All exercises are performed both with and without support on sticks, gradually increasing the number of repetitions and the pace of execution. The dosage of the load is determined by the child’s preparedness, well-being, and mood. Overload and violence are unacceptable. It is necessary to use game forms of exercises more widely, for example:
Turn by stepping around the heels of the skis 90°.
Turn by stepping around the toes of the skis by 90°;
Turn 360° by stepping first around the heels of the skis (first snowflake), then around the toes of the skis (second snowflake);
Stepping to the side alternately with the toes and heels of the skis; draw a “ski accordion” in the snow -
Show a standing stork - raise your strongly bent leg forward and hold the ski horizontally for as long as possible.
The listed exercises will help the child master the feel of skis and the feeling of snow in order to move on to the subsequent study of stepping and sliding steps.
All exercises are relatively simple and do not require any complex teaching methods; it is enough to show and explain the requirements for its implementation.
The main task is to achieve precision of movements, which contributes to the development of specific coordination and the ability to control skis.
The selection of exercises, their combination into a common system, and the sequence of execution provide for a gradual increase in coordination load and ensure the interconnection of individual movements. High-speed completion of the entire system of exercises will not provide coordination readiness to master numerous methods of skiing.
If, due to unfavorable weather conditions or for other reasons, classes are not held regularly, when they resume after a break, it is necessary to repeat everything that the child has already learned.
The stepping step is the main leading exercise to mastering skiing. It is performed in various gradually more complex conditions:
On a well-worn ski track;
On virgin soil with shallow and then deeper snow cover;
Zigzag around bushes, trees, stumps, benches, and other landmarks.
Moving with a stepping step, i.e. Without sliding on skis, as a rule, it does not cause any particular difficulties for the child. It is important to emphasize and master the following elements:
Cross (opposite) coordination of movements in the work of arms and legs, as in normal walking;
Full transfer of body weight from one leg to the other with each step;
Greater torso tilt compared to normal walking;
Specific swinging and pushing movements of the arms: when the forward swing with the arm slightly bent at the elbow joint is performed to eye level, and the push ends behind the thigh.
When fully mastering the stepping step, it is necessary to achieve free, sweeping, rhythmic, coordinated movements of the arms and legs with a slight tilt of the body and full, automatic control of the position of the skis, preventing them from crossing.
When the child masters the stepping step, explain and show him how you can move faster on skis: to do this, you don’t need to step, but push and slide, using poles not to support yourself and maintain balance, but to push off and increase speed.
The first sliding steps are performed on a well-knurled ski track laid down a slight slope from two starting positions:
From a skier's stance, in which the legs are slightly bent at the knees, the torso is slightly tilted forward, the arms are lowered, the hands are at the knee joint; from this starting position, take an energetic step forward, followed by a slight slide on one leg, then step and slide on the other leg, then repeat the same sliding steps;
Run up on straightened legs with a stepping step and then, picking up speed and squatting slightly, switch to sliding steps along the ski track.
Alternating exercises from these starting positions, pay attention to the complete transfer of body weight while sliding from one leg to the other.
To master single-support (free) sliding, gradually increase the length of the sliding step, master coordinated movements of the arms and legs, and develop balance, the following simple exercises are useful:
After a short run-up, slide on one ski with a stepping step until it comes to a complete stop, lift the second one slightly above the ski track;
Ski scooter - prolonged sliding on one ski by pushing off the other;
Sliding steps with wide rhythmic swinging of arms and amplitude characteristic of a skier;
Sliding steps with your hands behind your back;
Long-term sliding, first on one ski, then on the other, along a ski track laid downhill;
Sliding steps with sticks in hands held by the middle - make sure to swing your arms along the skis, and not in front of your chest;
Sliding steps with alternating push-off with sticks - an alternating two-step classic move in full coordination.
A skier's technique includes more than 50 methods of movement on different terrain and when sliding conditions change. As they master the stepping and then the sliding step and, in general, the alternating two-step move, preschoolers are taught other ski moves, including skating, descent stances, methods of lifting, braking and turning in motion.
Of the simultaneous moves, the basis of which is simultaneous push-off with the hands, the most accessible is the simultaneous stepless move. It is used when moving downhill on a well-rolled ski track and if there is good support for poles. When sliding continuously on two skis, the speed is maintained only by simultaneous pushes with the hands. Pay attention to the fact that when pushing off, the child tilts his torso a little more than usual, and when moving the sticks forward, he straightens up.
Of the skating moves, schoolchildren prefer the half-skate and, less often, the simultaneous two-step skating. With a half-skate move, one ski continuously slides along the ski track, and the second is placed at an angle to the direction of movement and is used to push off. For each push with the foot, a simultaneous push-off with the hands is made; these pushing movements coincide in time. Make sure your child uses one or the other leg to push off. Pushing with one leg is fraught with asymmetrical development of the musculoskeletal system. For equal use of pushing off with both legs, the ski track must be laid both to the right and to the left of the pushing leg.
When learning to descend, pay attention to the child's special seating position, which ensures stability on the descent. You need to sit down slightly, tilt your torso almost parallel to the slope, lower your arms and, placing your hands slightly in front of your knees, hold the poles firmly with the pins back. Emphasize the need to maintain this position from the beginning to the very end of the descent. If your child is afraid of going down, you need to go down with him. To do this, stand behind the child and place him between his skis.
The most accessible way to overcome a climb for preschoolers is a ladder. First, repeat side steps on a level area. Then, at the bottom of the slope, you need to stand sideways, put the top ski on the outer edge, and the bottom ski on the inside. From this starting position, perform side steps up the slope.
To change the direction of movement on flat areas and on slopes, a step-over turn is most often used, in which, vigorously pushing off with the outer leg in the turn, skating steps are performed in the direction of the turn.
As you grow up, during school years, you will master other ski moves, methods of ascents, descents, turns, braking, and overcoming unevenness. The foundation of ski training laid in preschool age is a healing, inexhaustible source of moral and physical health, spiritual and physical improvement of your child in future adult life.
1.4 Criteria for the preparedness of a skiing trainer-teacher to work with initial training groups
In the professional activity of a trainer-teacher, the following aspects should be distinguished:
Pedagogical
Medical-biological
Organizational
Logistical.
The main aspect of the activity of a trainer-teacher in initial training groups is still pedagogical. It includes, first of all, the recruitment of children for classes in the section, which requires great pedagogical talent to get children interested in skiing. To this end, the trainer-teacher must present arguments that can convince children of the advisability of skiing. These include: the health value of skiing, because classes are conducted mainly outdoors; the impact of skiing on most muscle groups; nurturing strong-willed qualities, perseverance, determination, etc.
One of the significant factors in the pedagogical activity of a ski coach is the selection of children for classes and further sports improvement.
When selecting, sociological, pedagogical, medical-biological and psychological aspects are distinguished.
At the initial stage of selection, the sociological aspect of selection is very important, which makes it possible to obtain data about the interests of children, to reveal the cause-and-effect relationships of the formation of motivation for long-term sports and high sports achievements.
It is well known that children living in more difficult conditions (poor material security, etc.), as a rule, show more hard work to achieve their goals. The specialty of the parents and their attitude towards sports is also important. Observations show that the simpler the profession (worker, driver, etc.), the more indifferent they are to their child’s sports activities. At the same time, the more intelligent the parents, the more categorical their attitude towards a particular sport. It's usually "yes" or "no". Parents who have an average intellectual level, are accustomed to physical labor, and are usually involved in skiing themselves are more interested in children's skiing.
The pedagogical aspect of selection at the first stage of long-term training allows us to assess the level of physical qualities, coordination abilities and sports-technical skills of athletes. It is used for pedagogical observation in order to assess their motor activity and some important data in terms of predisposition to sports activities, as well as for pedagogical testing, which allows determining the level of physical fitness.
At the same time, this aspect of selection has its drawbacks, which can damage the child’s poorly prepared psyche, since when assessing the sports suitability of children and adolescents, the coach-teacher gives an unambiguous answer: “pass” - “not pass.” Children dropped out of sports schools for various reasons are actually “excommunicated” from sports and handed over to be raised on the streets. A particularly difficult situation arises in cases where the dropout did not occur in the first year of preparation, but much later. These and
other disadvantages significantly affect the preliminary selection of children, especially for cross-country skiing.
When planning control tests, the following order of their occurrence is recommended: on the first day - speed tests; in the second - for strength and endurance. Control tests are best conducted in a formal competitive setting. In this regard, it should be noted that when conducting initial control tests it is necessary:
a) conducting 5-7 classes for initial physical and technical training, so that children generally perform all exercises correctly;
b) build the competition program in such a way that first there are speed and strength tests, and then only endurance tests, which makes it possible for the child to show the best results in each of them;
c) be sure to do a general warm-up, because children are not yet able to independently prepare for races;
d) pay attention to the child’s volitional manifestations when achieving results, i.e. identify his volitional capabilities;
e) analyze the child’s ability to switch from one test activity to another; f) identify mental stability during the entire testing, which is very important for elite sports.
The medical and biological aspect of selection is based on the use of research methods to identify morphofunctional characteristics, level of physical development, health status, etc.
During the initial selection, it is necessary to take into account that the most promising for skiing are children with somewhat inhibited development, i.e. retardants.
As for the morphofunctional features of the structure of the body, as a model of a cross-country skier and biathlete, the leading ones are the genetic inclinations that ensure the activity of the cardiovascular and respiratory systems. Along with this, it should be noted that in cyclic skiing, anthropometric data are not of decisive importance provided that the athlete does not have “excess” weight.
The psychological aspect at the beginning of sports activity involves the identification and formation of target characteristics, consisting of the search for reliable and psychologically stable athletes in a certain type of skiing.
The pedagogical aspect of the coach’s activity also includes educational activities carried out with children. It is at this age that it is necessary to cultivate qualities: hard work, a sense of duty, conscientiousness, responsiveness, goodwill, etc.
Thus, the main criteria for the pedagogical aspect of a ski coach’s activity are:
1. The ability to get children interested in skiing.
2. Education of moral and civic qualities.
3. Knowledge of modern techniques for teaching skiing techniques.
4. Selection of the most gifted children for skiing.
5. The ability to use the most effective means and methods of training, and above all, games-oriented training.
Chapter 2. Characteristics and methods of teaching ski braking
2.1 Ski braking training
The study of braking methods is carried out in the following sequence:
Braking with skis - “plough”, stop (“semi-plough”);
Braking with sticks - between the skis and on the side of the skis;
Slipping;
Stopping by falling
Task 1. Study of the main positions (postures) of the body during braking.
Means. Performing exercises on the spot (on a level surface) simulating the typical positions of the legs, arms, and torso with this method of braking
Task 2. Mastering the method of braking in general.
Facilities:
1. Descent from the mountain with the position of the skis, poles and body of the skier adopted on the spot, corresponding to the method of braking
2. Descent taking a braking position in light conditions at the beginning, in the middle and at the end of the descent.
3. Taking the braking position 2 - 3 times during one descent.
Task 3. Improvement in the implementation of braking methods.
Facilities:
1. Braking and stopping when descending the mountains on skis according to instructions and sudden commands in various places on the slope.
2. Repeated repetition of the braking method with gradual complication of the conditions for its implementation (speed of descent, length and steepness of the slope, condition of the snow cover, unevenness, etc.).
Guidelines
When performing the first exercise, a stop can be made either on command or at a pre-designated place.
In classes conducted in order to improve the performance of ascents, descents and braking, it is advisable to conduct all sections of ski equipment in a comprehensive manner.
Typical mistakes:
Excessive muscle tension and straight legs;
Abrupt placement of the skis on the ribs and uneven pressure on the skis in the “plow” position;
Wide spread of ski toes when braking with a “plow”;
When braking with a stop (“semi-plough”), the leg on which the slide occurs straight is not bent enough and is not loaded with body weight;
Sharp placement of the braking ski on the edge when braking with a stop (“semi-plough”);
Excessive pressure on poles when braking with poles;
The poles are kept far behind or between the skis;
The hand is not lowered close enough to the ring of the braking stick.
Error resolution methods:
Additional display;
Adopting appropriate postures and body positions on the spot;
Performing braking methods in light conditions.
2.2 Plow braking
Plow braking is used on slopes of varying steepness, on hikes and on walks. This is the most effective method, which allows you to significantly reduce speed on a slope or even stop, but it is rarely used in cross-country skiing - the strongest skiers practically do not use it.
Plow braking is performed as follows. When descending in the main stance, the skier springily straightens his legs at the knees and, slightly “throwing” his body up (relieving the pressure on the heels of the skis), with strong pressure, sliding the skis with his heels to the side. The skis rest on the inner ribs (edges of the skis), and their tips remain together; the knees are brought together, the body weight is distributed evenly on both skis, and the torso is slightly leaned back, and the arms take the position as when descending in the main stance. Increasing the angle of the skis and placing them more on the edges significantly increases braking.
Braking training is carried out according to the generally accepted scheme (story - demonstration - explanation), then students imitate movements in this method of braking. First, out of the blue, after showing and telling, schoolchildren take a working position several times (the “plow” position) and perform springy half-squats. The teacher checks the correctness of the accepted position. Then, on a moderately steep slope, students take turns braking, taking a position immediately after starting to move at the top of the mountain, and maintaining this position until the end of the descent or until they stop.
2.3 Stop braking
Stop braking is more often used when descending obliquely. The skier transfers his body weight to the upper (sliding straight) ski, and puts the lower one in the stop position: the heel is to the side, the toes are held together, the ski is edged on the inside edge. Increasing the angle of abduction and tilt of the ski increases braking. Throughout the entire braking, the body weight remains on the ski sliding straight (top), although a partial transfer of body weight to the ski that is in stop will lead to a change in the direction of movement, i.e. to turn with emphasis. This method is sometimes called "half-plow" braking.
Students who have mastered plow braking well usually easily master stop braking. When studying this method, you must first imitate the movements while standing still, taking the described positions several times. The learning methods and errors encountered when braking with a stop are similar to the errors encountered when braking with a plow. In the future, schoolchildren must master braking on slopes in both directions (from different legs).
2.4 Slide braking
Braking by side sliding (turning the skis) is used when the athlete needs to stop and go down the slope, achieving lateral sliding by edging the skis.
Braking is performed as follows. When descending obliquely, the skier squats slightly, then straightens up with a rather sharp push forward, removing the load from the skis, placing them flatter and moving the heels of the skis to the side with a lateral movement of the ankle joints. This is helped by the counter rotational movement of the torso and shoulders, as well as additional support on the stick. After moving the backs of the skis to the side, the amount of braking force depends on the angle of the skis: for sharp braking or even a complete stop, you need to place the skis across the slope and steeply on the edge. To study side-slip braking, lead-in exercises are used to turn on parallel skis from a stop. When teaching girls this method of braking, it is necessary to avoid very steep slopes.
When driving down a slope at high speed and unexpectedly appearing obstacles, it sometimes becomes necessary to brake sharply or even stop. If the distance to the obstacle is too short, the only way to prevent a collision is to deliberately fall. A controlled fall will reduce the possibility of injury and allow you to quickly get up and continue moving. Before falling, you need to sit down and then fall (gently “falling”) back to the side - on your hip and on your side. At the same time, the skis should be turned across the slope. It is better to scatter your hands with sticks up the slope. From this position, sitting down and then leaning on poles, it is easy to get up and, turning your skis, continue moving down the slope.
If the skis are crossed when you fall, you need to turn over on your back, raise your legs up and bring the skis to their normal position. Then turn over on your side again (skis across the slope) and stand up. In exceptional cases, when braking with skis is impossible (on a hiking trip, on a walk - in deep snow cover), and a fall is impractical, skiers can use pole braking (one on the side, two on the side, two between the skis). These methods will help to slightly reduce the speed in case of unforeseen circumstances. In cross-country skiing, such braking methods are not used.
2.5 Braking with sticks
Used in cases where it is impossible or irrational to brake with skis. This method allows you to slow down only slightly, for example, to avoid hitting a skier in front of you coming down the slope. To brake, the poles are vigorously pressed against the snow, being sure to hold them with their rings (paws, segments) back and closer to the body. The braking effect depends on the amount and duration of pressure on the poles. When they are separated from the snow, the braking effect ends.
2.6 Drop braking
Stopping by falling is used in emergency cases when you need to quickly stop the descent. To do this, you need to squat down as low as possible and fall to the side, throwing your arms and poles back, spread out, put your skis across the direction of descent and, resting them on the snow, slow down further sliding. A typical mistake is falling without first grouping the body, which can lead to bruises.
Bibliography
1. Antonova O.N. Ski training: Teaching methods: Textbook for students of secondary pedagogical educational institutions / O.N. Antonova, V.S. Kuznetsov. - M.: Academy, 1999. - 208 p.
2. Butin I.M. Skiing / N.M. Butin, V.A. Vorobiev. - M.: education, 2000. - 198s
3. Butin I.M. Skiing / N.M. Butin, V.A. Vorobiev. - M.: education, 2000. - 198s
4. Skiing in the profession of a physical education teacher / A. A. Krestovnikov [etc.]. - St. Petersburg: publishing house of the Russian State Pedagogical University named after. A.I. Herzen, 2000.
5. Ramenskaya T. I. Skiing: textbook. manual for self work of university students in physics. cult. / T. I. Ramenskaya, A. G. Batalov. - M.: Physical culture, 2005.
Posted on Allbest.ru
...Similar documents
The health benefits of skiing. The influence of ski training on the body of a preschooler. Formation of movements of preschool children. Stages of ski training. Methodological recommendations for organizing ski training in a preschool institution.
thesis, added 03/21/2012
Organizational and pedagogical aspects of training athletes. Features of preparing children in a preschool institution. Means and methods of teaching and training athletes. Principles of organizing educational and training sessions with a group of initial training.
thesis, added 05/18/2012
Educational and training process of young athletes in the initial training group. Methodology for teaching basic technical techniques in attacking basketball players. Organization of a study of the dynamics of indicators of physical and technical readiness of children.
thesis, added 07/23/2011
Anatomical and physiological structure of children 15-17 years old. Features of physical development when playing sports. Organization of ski training in educational institutions. Organization and results of a study of the influence of ski training on the body of adolescents.
thesis, added 10/27/2010
Fundamentals of technical training in powerlifting: training methods, technical aspects. Organization of the educational and training process at the initial training stage. Identification of characteristic errors of competitive exercises in groups. Isometric method.
thesis, added 11/25/2013
Psychological characteristics of the individual and the authority of the coach, his professionally important qualities. Typology of coaches and the role of the coach at the initial stage of training tennis athletes. A study of the elements most significant for the successful work of a coach.
thesis, added 07/11/2016
Sports selection of candidates for sports, its goals and objectives. Selection criteria and orientation of children for gymnastics. Educational and educational work in the Youth Sports School. Purpose, objectives, organization, selection and staffing of initial training groups for youth sports schools.
thesis, added 10/22/2007
Characteristics of orienteering as a sport. Justification of the set of exercises and methods of their use in the experimental group. Construction of athletes' training during initial sports training. Errors in orienteering.
thesis, added 03/09/2010
The importance of physical training in boxing. Means of special physical training for boxers. The importance of speed-strength qualities in technically trained athletes. Improving the process of sports training at the stage of initial specialization.
course work, added 01/20/2015
Analysis of the validity of the amount of educational and training time for mastering the main sections of training at the initial stage in mountain tourism and mountaineering. Modernization of the methodology for the initial training of mountain tourists. Special physical training.
Gentle rise overcome by alternating upward movement straight, steeper ones - diagonally or zigzag. If the ski's grip on the snow is insufficient, you can use the herringbone method. (Fig. 22). It is performed with a stepping step straight up. The ski is alternately put forward, turned with its toes outward and placed on the inner ribs. With the next step, the heel of one ski is transferred through the heel of the other. On steep slopes the skis are spread wider with their toes, placed more on the edges, the stride is made shorter and the support on the poles is stronger.
Very steep climb overcome using the “ladder” method. (Fig. 23). Standing sideways to the slope, the leg closest to it should be put to the side and lean on the outer edge of the ski. Then, pulling the other leg up, place the ski next to it on the inner edge.

Descent from the mountain and ways to turn
Direct descent stance: skis together, knees bent - they work like springs, arms slightly spread to the sides, poles - back.
Descent from the mountain produced in high, medium (main) and low stance. (Fig. 24). The most convenient is the middle one: in this stance it is easier to make turns, overcome various irregularities, and brake. When going down a mountain, you should never hold poles in front of you, so as not to bump into them. In a high stance, the legs are straightened more than in the main one. In a low stance, the legs are more bent, the head and torso are tilted forward, and the arms are extended forward.
For greater stability one ski on descent pushed forward a little. Going down diagonally, the weight of the body is transferred to the lower ski, slightly pushing the upper one forward.
In this case, the skis are placed on the edge, and the knees are brought closer to the slope. When descending from a mountain, if the gliding worsens, the body must be tilted back, but if the gliding has improved, lean forward slightly.
At the end of the descent due to the fact that skis Before moving to the horizontal section, they cut deeply into the snow and brake (on the so-called “rollout”), it is recommended to push one ski forward further, tilt the body back, and then take a low stance.
 How to brake on a descent
 To descent reduce the speed and gradually slow down, just sit astride the poles in a low stance and press them into the snow. The most reliable way to brake is with a plow. (Fig. 25). When descending the mountain, spread both heels to the sides and place the skis on the inner ribs and bring your slightly bent knees closer together.  The more the heels are apart, the stronger the braking will be. The weight of the body is distributed evenly on both skis.
There is another single ski braking method- "half-plough". (Fig. 26). One heel is moved to the side; When descending, they rely only on the ski, which provides support. Ski socks together.
The leg on which you slide is bent and feels the weight of the body.
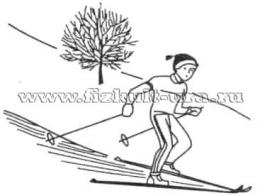
Side-slip braking on the edges of the skis is used on very steep slopes (Fig. 27). And when you need to slightly change direction or go around an obstacle, they do this by skiing to the right or left.  The simplest turn at low speed with pre-braking is plow turn. (Fig. 28). It was previously stated that when braking with a “plow”, the weight of the body is evenly distributed over both skis.
If, during the descent, you transfer the weight of your body to the right ski, then they will turn to the left, if on the left, they will turn to the right.
Descending from the mountain obliquely at high speed, they make “half-plough” turns. (Fig. 29). Descending from the mountain obliquely to the right, upper right ski move the heel to the side at an angle to the left and push it forward slightly. If you then place the left ski flat on the snow and transfer the weight of the body to the right, a turn to the left will begin.
Many people love active recreation and go to a ski resort in winter. Beginners immediately take several skiing lessons from an instructor. From the outside, everything seems so easy, but it takes special skill to descend slopes correctly. It is important to learn braking techniques in order to ride beautifully and with pleasure. The most important braking technique is “plow” and “stop” (“semi-plough”).
In what cases is it used?
Experienced skiers navigate the slopes without using braking, because many years of experience give them many different tricks. An insufficiently prepared skier often cannot cope with high speed on the fly, so it is imperative to learn how to reduce it. “Plow” or “stop” braking is used in cases where an unexpected obstacle appears, if one of the participating skiers suddenly falls.
At competitions, spectators can be a nuisance. The “plow” braking technique on skis is sometimes used when the route is not well known, on very sharp slopes. This is a very effective way of suspending. It helps you adjust your fast pace and slow down.

Start with a plow stance
What is the meaning of the expression “in the plough”? Anyone who has ever seen the structure and operation of an ordinary plow will immediately understand what position the athlete should take. For the skier, this means that he must adopt a stance that will help him control his speed through braking or stop. Even a novice athlete can perform braking with a “plow” without difficulty. Where to start performing a stand? It is carried out according to the following plan:
- The fronts of the skis must be brought together, and the backs must be spread out to the sides as much as possible. The ideal distance between socks would be 6-8 cm.
- Legs need to be bent at the knees and ankles.
- The body must be bent forward.
- Your arms, slightly bent at the elbows, should be extended in front of you.
- It is advisable to distribute body weight equally on both skis.
- The poles should be pointing backwards.

Several ways to use this stand
There are several ways to learn how to perform plow braking on skis:
- The simplest technique is to put one leg to the side. It must be performed while in the main stance (legs bent at the knees, body tilted forward, arms in front). One leg remains in place, and the other needs to be set aside, but the toe should not move further than 10 cm from the other.
- While in the main position, you can put the skis aside one by one: the front ends are together, the rear ends are apart. In this case, the skis should tilt on the inner ribs.
- Jumping plow technique. To do this, you need to jump slightly and at the same time bring your toes together and spread your heels.
- The fourth effective technique is to gently press on the runners to push your heels apart, slowly straightening your knees and ankles. As a result, your legs need to be straightened completely.
Plow braking while moving
Once a beginner skier has tried the plow stance, it's time to test it in motion and learn to pause at the bottom of the piste. Most often, long slopes with access to straight terrain are chosen for the route. In such cases, there is no risk of injury due to a sudden fall.
First, the athlete climbs the slope. After this, he takes the basic ski stance (described above). He then moves straight down the track. After gaining speed, he prepares to perform “plow” braking: gradually straightens his legs, straightening his knees. Then the skier bends his knees, presses on the inner ribs of the skis and spreads the backs to the sides. Thus, this action resembles the work of a plow. When rolling out, he applies braking, transferring his body weight to the inner ribs of the skis.
Beginner skiers may have numb legs after the first braking, but don’t worry - this is normal at first.

"Plow" helps control speed
On steep slopes, plow braking helps control your riding speed. What will it depend on? To experiment, you need to climb a sloping slope. After this, you should take a “plough” on the slope. Then in this position you need to start moving down. You should not be afraid of high speed, because this braking is very reliable. If you systematically bend and straighten your legs, and also press on the inner edge of the skis, and change the gap between the backs, then you can safely reduce or increase the speed. When the angle between the rears increases, the movement will slow down, and when it decreases, the ride will speed up.
Improving braking
Once a beginner skier has mastered braking on small slopes, you can begin to master steeper slopes or slopes where the terrain changes. The most common mistakes that beginners make when mastering the “plow” method are the following: the tips of the skis sometimes cross, the pressure on each ski is unevenly distributed, which changes the direction of movement. Sometimes beginners don’t spread their heels far enough or bend their knees a little and don’t bring them together. If such errors occur, you should practice several more times on low slopes.

"Push" technique
Anyone who has mastered “plough” braking can easily use the “stop” method. To make it easier to understand its essence, you can imitate movements on the spot several times. Such braking is intended for descents obliquely, diagonally. This is a kind of ski turn or side slip. Here is an example instruction for stop braking:
- To begin with, when descending, you need to sit down slightly.
- Then you should make a sharp push forward and straighten up. This allows you to take the load off your skis.
- The next action is to turn the ankle joints, which helps turn the skis at an angle on their side.
- To perform this movement, the shoulders and torso are involved.
- The greater the ski turning angle, the stronger the braking will be.
Ultimately, you can use a stick support. In order to come to a complete stop, the skis must be placed across the slope strictly on the edge. Most often, this braking method is used by men or experienced athletes; girls are better off using it on low slopes, because it requires a lot of strength and dexterity to perform it.

Controlled fall
What to do in cases where it is impossible to use either the “plough” or the “emphasis” technique? There are times when a skier is moving down the slope at high speed, and suddenly an obstacle suddenly appears in his way. In this case, you simply need to brake or stop sharply.
Sometimes the only way to prevent hitting an object is by deliberately falling. This is in cases where the obstacle took the skier by surprise and is so close that there is no way to slow down. If you skillfully manage a fall, then there is a chance of not getting injured, quickly getting up and continuing skating.
For such a case, you need to know the following tricks of a controlled fall:
- First you need to try to sit down.
- Then you need to try to fall back and to the side.
- At the same time, you should turn your skis across the track.
- Then, with the help of poles, you can easily rise and continue sliding again.
There are cases when such a fall causes the skis to cross. Then you should roll over onto your back, raise your legs up and point your skis to the desired position. After this, you need to turn over on your side and get up.
In some cases, tourists use stick braking. This happens when there is a lot of snow on the slopes, when falling is inappropriate. These methods are only suitable for amateurs; athletes do not use them in racing.
Skiing is one of the most common sports in the winter season. To successfully complete the distance, you need not only to learn how to stand on this sports equipment and move, you need to learn how to brake correctly on skis, and bring this skill to the level of reflexes. Theory is good, but practice is also necessary. Proper stopping will avoid numerous injuries and dangerous situations. Typically, athletes cover the entire distance without breaks, but at critical moments or when sudden obstacles arise, emergency braking may be necessary.
How to brake on alpine skis?
Alpine skiing is characterized by the development of high speed and a significant slope of descent. In such conditions, it is recommended to begin training to urgently reduce the pace on the flattest routes, gradually increasing the angle of inclination of the plane. The logic is simple - the flatter the slope, the easier it is to brake.
Emergency braking cannot be carried out using random objects (trees, poles), you need to go around them. In addition, it is not recommended to panic at high speed. It weakens concentration, which can lead to injury. Parts of the route or ski track without snow cover will also not be a salvation, but will add to the trouble.
For an emergency stop, it is worth using a movement to a horizontal position (fall); this method works best when moving obliquely from a slope. At the same time, there is a high probability that in the absence of correct knowledge of how to brake properly on skis and sufficient training, the fall will be quite painful.
A fall can be considered as a type of emergency braking with the highest efficiency coefficient. You need to do this correctly:
- Do not fall on your back or rear; at high speeds, the sliding will continue.
- You need to fall on your side, and the first thing that touches the surface should be your thigh - this will absorb the impact and reduce the likelihood of injury.
- When slowing down, you should use your hands, but do not grab everything, but use them as an element of additional resistance.
With a well-thought-out and successfully executed fall, the risk of injury tends to be zero. In this regard, it is recommended to conduct several training sessions with an instructor to understand how to brake correctly on alpine skis. Safety comes first.

How to brake on cross-country skis?
Stopping on cross-country bikes is easier than on mountain bikes. This is due to the type of terrain used for the route. For cross-country skiing, a flatter slope or even flat terrain, a well-trodden track, is used. Often braking is not required at all along the entire length of the track; it becomes necessary only under unexpectedly changed circumstances.
You can also brake by turning, just like with a “plow”; the athlete chooses the method himself. Any type of braking can cause you to fall. In this case, you will need to learn not only how to brake correctly on cross-country skis, but also how to fall and get up. If the skis have taken the position of the Latin letter X, then you should turn over on your back, raise your legs perpendicular to the ground, and move the skis to the correct position.
After the finish line, a braking strip must be provided at the distance.
How to brake on skis on a descent?
For training, it is recommended to choose smooth and well-trodden slopes. First of all, it is recommended to study the simplest method of braking - turning the foot, sometimes called braking. The order of the exercise is as follows:
- Before descending, it is recommended to carefully check your own position - the support under your feet must be strong. The heels should be carefully pressed.
- You should start braking only after gaining sufficient speed.
- After an acceptable speed has been achieved, you need to turn the skis perpendicular to the direction of movement.
Initially, many who decide to master this method of stopping often fall, but over time it becomes easier: the muscles and vestibular apparatus get used to the action. Loss of balance is associated with the position in which the exercise is performed - low stance, position of the skis shoulder-width apart, the load is applied along the entire length. This method of stopping is the most effective, but it should only be used by those who can handle the load well and are completely confident in themselves.
You can reduce the speed on a descent using a sliding stop. The emphasis is the movement on skis, the position of which resembles the letter “V”, that is, the toes are close together, and the rear parts are as far apart as possible. This method of braking is very similar to the “plow”, but there are still some differences:
- the stop technique does not stop the movement, but only slows it down;
- After learning this method, you can master turns much easier.

This method is suitable for reducing speed on fairly gentle slopes. It is often used during training with those who are a little afraid: such promotion on a psychological level creates a feeling of safety in beginners.
Important to remember
In order for the body to know how to brake properly on skis, it is recommended to conduct several training sessions, study both methods, and their combination. Combination is suitable in case of too much overclocking. First you need to slow down using the stop, and then turn your feet from this position. With this method of braking, the stop will most likely be accurate, and you will be able to avoid falling.
To complete the distance successfully, you need to know how to brake correctly on skis downhill, how to transfer the village from the main stance to all the others. The main stance consists of a tilted body and slightly bent legs. In order to accelerate, you need to bend your legs even more, stretch your arms back, and bend your body to the ground. Thus, in accordance with the laws of aerodynamics, the body becomes more streamlined by air flows and accelerates. To smoothly reduce the pace, you should change your body position in the opposite direction, that is, straighten your body and straighten your legs. To maintain stability, it is recommended to leave your legs slightly bent and relaxed, then they will act as shock absorbers. Concentration and dynamics of body position relative to the surface will help maintain balance throughout the movement. It is necessary to change the stance depending on the circumstances, and not according to an algorithm. When moving at speed, all parts of the body play their role: real professionals can, with a subtle change of position, increase or decrease the speed, change the trajectory of movement.

Plow braking on skis
Braking with a “plow” on skis is quite popular among athletes of various categories; in addition, this body position can be the basis for several elements of movement. A similar stance is used during a straight descent and allows you to transfer the load to both legs. In this position, the heels are spread apart and the toes of the skis are touching.
The position of the body with this method of stopping also matters. The tilt of the torso decreases, and the body is pulled back. The sticks must be firmly grasped with your hands, and the hands must be extended slightly forward and brought together in front of the body.
To move into a stance during a free descent, you need to bend your legs slightly and straighten them sharply after completing the change in the position of the ski. This will provide the greatest pressure along the plane and resistance to movement. As you know, the greater the resistance, the faster the speed decreases. The heels should apply the most pressure. The distance between the ski heels depends on the speed of descent, braking distance and the general characteristics of the snow cover.
It is recommended to study skiing with a professional instructor; his experience will help you understand the intricacies of the sport and avoid “stupid” injuries. In the absence of a teacher, you should choose the safest sections of the route, preferably intended specifically for training. Before starting training, you need to carefully check the fastenings of equipment and clothing. If it is not possible to purchase a special uniform for skiing, you can use the items in your wardrobe. They should not restrict movement, but be warm enough to avoid frostbite. By following all the recommendations, you can avoid unpleasant traumatic situations.