What muscles work during the bridge. Gymnastic element "bridge". Execution technique
Although the bridge is not a popular exercise among bodybuilders and weightlifters, but this exercise is one of the most effective ways to train the spine and deep back muscles.
How to make a bridge? At first glance, a fairly simple bridge exercise has a number of nuances. To make the right bridge you need to focus on:
breathing, it should be slow and measured.
back, a straight back should not be allowed, it should be well arched.
hands and feet, ideally they should be straight, but to facilitate the exercise, you can bend your knees.
pelvic position, it should be above the head.
Benefits of the bridge
Regular performance of the bridge exercise has a beneficial complex effect on the body. Bridge - is included in the list of the best exercises to strengthen the muscles of the back, which allows you to protect the spine from many diseases.
Back bends help improve blood flow and muscle nutrition. This stimulates the growth of muscle mass, strengthens the spine and promotes straightening.
In the process of performing the bridge exercise, all vertebrae are involved. That allows you to get rid of the problem of bulging discs, return them to their place.
This exercise helps to increase the chest and improve digestion. Stimulates the muscles of the thighs, abdomen, arms and legs.
How to learn to make a bridge
There is a specially designed program by Paul Wade "how to get on the bridge", designed for 10 levels. It prepares the body to perform the bridge exercise from a standing position.
When executing the program, the following rule should be observed:
“You can’t move on to the next level exercise until you are confident in the previous level exercise.”Paul Wade
Level 1: Shoulder Bridge
The shoulder bridge is the simplest exercise, well suited for the prevention and treatment of spinal dislocation.
Starting position: lying on the floor, legs bent at the knees, feet pressed to the floor parallel to each other, arms crossed on the stomach. Due to the strength of the legs, we push the hips and the lower part of the spine up so that they are at the same level and at the same time we exhale deeply. We're back in a couple of seconds.
You should start with 10 repetitions, gradually increasing to 50 repetitions in 3 sets.
Level 2: Bridge on outstretched arms
Starting position: sitting on the floor, the back is straight, the legs are extended forward and pressed to each other, the socks are looking up, the arms are straight along the body, the hands are pressed to the floor. It is necessary to tear off the torso from the floor in such a way that a straight line is obtained from the head to the heels.
The fulcrum remains the hands and heels of the legs, the head should be raised to the ceiling. The exercise is performed on the exhale and lasts a few seconds. Gradually increase the total number of repetitions from 10 to 40, in one and in three sets, respectively.
Level 3: Bridge from the bench
To perform this exercise, you will need support - ideally a bench at knee height, but you can also use a bed, and even a table to facilitate the exercise. It strengthens the pectoral muscles and hands.
The meaning of the exercise is as follows. The upper part of the body - shoulders, neck, arms, head - is on the bench, legs are spaced shoulder-width apart, feet are parallel to each other. Leaning on the hands, we gradually straighten our arms at the elbows and tear off the shoulders from the bench, round the back, head thrown back.
We linger in this position for several minutes and then lower ourselves onto the bench, first the shoulders, then the head. We start with 8 repetitions, bringing up to 30 in 3 sets.
Level 4: Bridge from the support position on the head
This exercise serves as an important intermediate step on the way to performing a full-fledged bridge. Based on the name of the exercise, it is already becoming clear that the bridge is performed on the floor from the position of emphasis on the head due to the maximum extension of the arms at the elbows.
This exercise should be done very carefully. You can not make sudden movements and strain the muscles of the neck.
Level 5: Bridge from a prone position on the ball (half bridge)
Lie on your back, grab a volleyball-sized ball and place it under your lower back. Bend your legs at the knees at shoulder level and pull them towards your hips. Put your hands behind your head and rest your hands on the floor.
Push off the floor so that the main points of support are the palms and feet, and the lower back lightly touches the sword. Then you need to stand on the bridge, rounding your back as much as possible.
Training should start with 8 repetitions, increasing to 2 sets of 20 times.
Level 6: Full bridge from a prone position on the floor
From a lying position on the floor, the legs are bent at the knees, the feet parallel to each other at shoulder width are pulled up to the hips, the arms are behind the head, the palms rest on the floor, the fingers are turned to the body, we round the back, raising the hips as much as possible upward due to the strength of the arms and legs . We linger at the top for a couple of seconds and slowly lie back on the floor.
This exercise is performed 8 times, gradually increasing to two sets of 15 repetitions.
It strengthens the muscles of the back, arms and legs, improves breathing and posture.
Level 7: Lowering hands along the wall to the floor (bridge descending along the wall)
Getting up on the bridge from a standing position, slowly descending along the wall, of course, is easier than from a prone position. But it also takes practice.
Stand with your back to the wall at the level of outstretched arms, lean against the wall with your palms, tilt your head back and slowly lower yourself down, “walking” along the wall with your palms. Bend your knees as you lower. As a result, you need to rest your hands on the floor to make a bridge.
Start with 3 repetitions, gradually increasing to 10 for 2 sets.
Level 8: Raising hands along the wall from the bridge (climbing from the bridge along the wall)
This exercise is a logical continuation of the exercise "lowering the hands along the wall to the floor" and is done in tandem with it. After you descend into the bridge along the wall in reverse order, you need to climb it, smoothly rearranging your hands one after another.
For the first time, 2 repetitions of the cycle are enough. To reach the advanced level, you need to complete 2 sets of 8 reps.
Now we can proceed to consider the question: “How to make a bridge while standing?” This is what the last two weeks have been about.
Level 9: Incomplete bridge from a standing position
How to make a bridge back? It is necessary from a standing position with feet shoulder-width apart, gently bend back in the back and reach the floor with straight arms.
An incomplete bridge from a standing position differs from a full one in that after reaching the bridge, the torso falls to the floor. To perform the repetition, you must stand up again.
This exercise is technically very difficult, so for beginners it is recommended to repeat only 1 time. Aerobatics is considered to be the performance of 2 series of 6 repetitions.
Level 10: Full bridge from a standing position
The final exercise is the full bridge from a standing position. It involves the continuation of the exercise worked out for 9 weeks, and includes lifting the torso up from the bridge stance.
To perform this exercise, it is necessary to redistribute the body weight on the legs and, pushing off the floor with your hands, gradually stand up. In the process of lifting the torso to a vertical position, almost all the main muscles of the back, abdomen, chest, legs and arms work.
For beginners, one rep is enough. Ideally, you need to do 2 sets of 10-30 times.
How to get on the bridge video:
Style Outcome.
We recommend the bridge exercise as one of the most effective ways to strengthen your back muscles and make your spine flexible. Paul Wade's 10 Levels program will not only teach you how to do the bridge, but also develop flexibility, endurance, and even work out the abdominal muscles.
The bridge is a gymnastic exercise that can be performed to strengthen the back muscles, correct posture, develop flexibility and improve blood circulation in the tissues surrounding the vertebral discs.
In bodybuilding, the bridge is rarely used, since the very specificity of this sport implies for the most part an assessment of the appearance of the athlete. The goal of exercising in the gym for many is the most beautiful body, but not always the maximum healthy.
Meanwhile, a strong back and a flexible spine will allow any bodybuilder to achieve significantly greater results in training. And this is not to mention the fact that the main bonus of doing the bridge exercise regularly is the absence of back problems and good mobility.
The benefits of exercise
Good mastery of the bridge technique and its regular implementation leads to a number of positive changes in the body:
- The muscles that straighten the spine (extensors of the back) are strengthened. These are long muscular "ropes" that run along the entire spinal column on both sides.
- Many small muscles of the back and body are trained, as well as muscles of the arms, legs and buttocks.
- Increases the flexibility of the spinal column and the overall mobility of the body.
- The abdominal muscles are stretched, the chest is opened.
- Blood circulation is activated in the tissues surrounding the intervertebral cartilage. This prevents premature wear of the vertebral discs.
- The rush of blood to the head increases cerebral circulation and simulates mental activity.
In addition, with a clean performance, this gymnastic element allows you to demonstrate your flexibility and physical fitness.
Contraindications
However, the bridge also has contraindications. It should not be done when:
- diseases of the spine, gastrointestinal tract, high blood pressure or headaches;
- pregnancy;
- injuries or diseases of the joints.
The exercise should be mastered gradually, starting with its simplest variations. Then your body will have time to adapt to the hitherto unusual load.
Execution technique
Before we talk about how to stand on the bridge, let's define exactly what the position of the body in this position should be:
- The back when performing the bridge should be arched in an arc. Bridge with a straight back, made at the expense of the limbs, is incorrect.
- The buttocks should be above the head and shoulders.
- The limbs should be as straight as possible, the hands should be on the palms, and the legs on the feet. The distance between the palms (as well as between the feet) should be equal to the width of the shoulders. It is not easy to achieve this level of performance, but we are now talking about the ideal option.
- Breathing should be free, without delay.
In order to learn how to perform the bridge correctly, you need to consistently work out all the exercises leading to it. We list these exercises, and then give a description of each of them. They are arranged in order of increasing difficulty:
- Straight bridge (you may have heard of this exercise called the “reverse plank”).
- Classic full version.
Actually, you can stop at the fifth point, however, there is no limit to perfection. Therefore, we move further towards complexity:
- Bridge up and down the wall.
- Leaving the bridge from a standing position.
- Rise from the bridge to a standing position.
Lead up exercises
Shoulder bridge
To perform this exercise, you should lie on your back and place your feet on the floor, bending your knees. Hands can be extended along the body or folded on the stomach. This is the starting position.
When you can complete this exercise for 3 sets of 50 reps, move on to the next one.
Starting position: sitting on the floor, legs straight, extended in front of you. Palms rest on the floor on both sides of the body, fingers pointing forward. The back should be kept absolutely straight.
Next, lift your pelvis off the floor and straighten your torso to a straight line. The feet in this position will rest on the heels, and the gaze is directed upward diagonally. We do not press the head to the chin and do not bend the neck. The whole body is one straight line.
When you can cleanly perform 3 x 40 reps, move on.
Exit to the bridge from the bench
To practice this exercise, you will need a bench, a low box, or other stable support. Sit on a bench, place your palms on its edge on either side of you. Move your feet forward and lower your shoulders onto the bench. Rearrange your hands so that your palms are completely on the bench, and your fingers are pointing towards your feet. In this case, the feet should be on the floor, and the knees bent at a right angle.
Rise from the bench due to the strength of the arms and arch your back as much as possible. You are almost on the bridge! Do 3 sets of 30 reps.
Take a ball or a small ottoman. Any small object will do. Sit on the floor and place the ball behind you. Then lie on it with the middle of your back.
Place your feet on the floor and bend at the knees. Place your hands over the top on the floor near your head, fingers to your feet. and put your head down. From this position, straighten your arms and legs and arch your back as much as possible.
2 sets of 20 reps will suffice.
classic bridge
This exercise is performed in exactly the same way as the previous one, only without the ball. In the deflection, you rise immediately from the floor. At the same time, the head is freely lowered down, there is no tension in the neck. The distance between the legs (as well as between the arms) is equal to the width of the shoulders. Try to arch your back as much as possible and fully straighten your limbs.
We do 2 sets of 15 times.
Practicing the perfect bridge from a prone position can take some time. You can choose to stick with this way of doing the exercise, or you can make the task even more difficult.
Complication of the bridge
Having worked out the classic version of the bridge well, you can try to perform the exercise from a standing position.
Climbing up the wall
Stand with your back to the wall at a distance of 2 steps from it. Bend back and rest your palms against the wall. Point your fingers down.
Take small steps with your hands on the wall and thus lower yourself to the floor. You can step back a little with your feet so that the distance to the wall is comfortable. Stay on the bridge for a few seconds.
Now you need to get your hands back on the wall. This is more difficult than the descent and requires more effort. All movements are performed in reverse order. At the end point, you must return to the starting position - standing with your back to the wall.
Step back and forth 8 times, do 2 sets.
Stand up straight, feet shoulder-width apart, put your hands on your belt. Further:
- Bend your knees and bend your pelvis forward, tilt your head back. You must see the space behind you.
- When you feel that further deflection will lead to loss of balance, raise your arms, bend your hands so that your fingers are pointing back.
- Take your arms back as much as possible, bend your back, take your pelvis forward and spring your legs. Your task is to overcome the fear of falling and land softly with your palms on the floor behind your back.
- When your hands touch the floor, stay in the bridge for a few seconds and lower yourself to the floor.
You can ask your partner to insure you by holding his hand under your back. This exercise requires well .
When you manage to complete it in 2 sets of 5 times in a row, you can proceed to the last step.
Getting up to a standing position
So, the final task. Now you need not to go down into the bridge, but on the contrary - to rise from it. Get into the starting position. Push off your hands from the floor, swing your pelvis forward and bend your legs. At the same time, due to the powerful effort of the abdominal muscles, lift the body to a vertical position.
You can try to combine this and the previous movement. We descend into the bridge and rise from it. Do the descent-ascent three times, rest a little and repeat the approach.
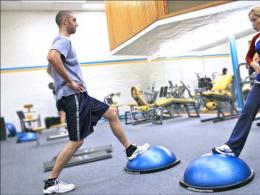
is an isolating, pre-appointed for a targeted study of the biceps of the thigh and gluteal muscles. As a rule, this exercise is performed by girls, because it does not so much contribute to muscle hypertrophy, but how-to-no-zi-ru-et them and stretches them. The bridge exercise is also useful if you sit a lot, as it tones the lower back extensor and normalizes blood circulation in the hip area. The exercise is an antagonist of hyperextension, so they are often performed together, or just in one workout, or in general. superset . The exercise is not difficult, it is performed without additional load, so it is often recommended for beginners.
Bridge exercise is great for warm-ups , or for the pro-ra-bot-ki of the missing muscle groups. The key point of this exercise is to make an effort due to the buttocks, that is, in the initial phase of the range of motion, the athlete must bring the buttocks together and, as it were, twist them up. It is possible that at the initial stage there will be difficulties associated with muscle feeling, which will not allow you to make a bridge due to the target muscle groups, but this is not scary. The exercise, as noted above, is performed without additional load, so it’s difficult to get injured, but with a little practice, you will definitely learn to feel and control your muscles .
Work of muscles and joints
The main working groups are the back of the thigh and buttocks, but the long back muscle and the press also perform the function of stabilizers. The quadriceps is partially involved, which, in general, is able to steal the load from the target muscle groups if the athlete performs the bridge exercise incorrectly. It is important to concentrate on bringing the groin up, that is, how the groin should be at the top point. Physically, of course, the groin cannot be higher than the knee joint, but the range of motion should be exactly as if you are trying to push the groin up.
The load is concentrated in the hip joint, as, in general, in all isolation exercises for the hamstrings and gluteal muscles. Since the hip joint is large, it is recommended to warm up thoroughly before doing the bridge exercise, you can even run on the treadmill for 5-10 minutes, or spin the exercise bike. The bottom line is that from the load in the joints you-de-la-et-sya si-no-vi-al-naya liquid that lubricates them, which, in turn, levels out the likelihood of herbs -mi-ro-vat-sya. That is why, the larger the joint, the longer it takes to warm up before working approaches, but it is also important to warm up not only the work area, but, in general, the whole body, since even isolation exercises, one way or another, indirectly or directly, but involve a large number of muscle groups.
Bridge exercise - scheme
1) Lie on the floor, bring the shoulder blades together so that the neck does not lie on the floor, the trapezoid should rest on the floor, while you can either lower your head to the floor or keep it slightly raised.
2) Bend your legs at the knee, approximately 100-110 °, rest your heels firmly on the floor, the width of the feet is slightly wider than the shoulders, the toes look forward.
3) Slowly, tensing the gluteal muscle, as if turning it inward, lift the groin as high as possible, while the knees should remain in a fixed position.
4) Pausing at the point of peak contraction of the gluteal muscles, slowly lower the buttocks to the starting position.
5) Barely touching the floor with the gluteal muscle, repeat the exercise again as many times as necessary.
notes
1) It is recommended to perform the exercise in a large number of repetitions and approaches, with a rest between them no longer than 30 seconds.
2) It is necessary to inhale through the nose in the negative phase, and exhale through the mouth in the positive phase, but the exhalation must be powerful.
3) The exercise is performed without jerking if you have reached positive rejection
, then just do not repeat to the end, fixing the position of the body for a couple of seconds in the "dead center".
4) Do not tear off either the toe or the heel from the floor, the foot should rest firmly on the floor, but distribute the center of gravity between the heel and the outside of the foot.
5) The structure of the hip bone is individual for each person, therefore, if it is inconvenient for you to keep your legs a little wider than your shoulders, you can try to put them a little narrower or wider, focusing on which position of the legs you feel muscle contraction better.
Anatomy
The gluteus muscle is one of the largest in the human body; it, along with the adductor muscle of the thigh, allows a person to walk straight. As a result, a person uses the buttocks in everyday life, therefore, in order for us to walk long distances, the muscle composition in this part of the body is mostly represented by slow muscle fibers. In this regard, it is necessary to train the gluteal muscle in a large number of approaches and repetitions. Nevertheless, the buttocks are a fairly powerful muscle, so you won’t get off with one exercise like a bridge, in your training of the gluteal muscles you need to include heavy basic exercises.
The biceps femoris, which also receives a load in this exercise, is located on the back of the leg, and it must be tightened in order for the leg to look at-le-tich-but. Other muscle groups, such as the long back muscles, are also important to keep in good shape, because, together with the press, they allow you to keep your posture, which favorably emphasizes the proportions of the body. First of all, this, of course, is ka-sa-et-sya de-wo-shek, although for men the center of the body also plays a very important role, because the “pu-zo” half-nose-tew doesn’t the beauty of the na-ka-chen-ny biceps and pectoral muscles. That is why we re-ko-men-du-em train the whole body so that every part of it is perfect!
Before getting up on the bridge, it is necessary to stretch the muscles of the shoulders and back. Later, you can quickly perform the exercise without much warm-up, but for this it should become simple and familiar to you. Beginners in gymnastic exercises need to warm up.
To successfully complete the "bridge" you need to master the exercises that develop the flexibility of the back.
Spinal Flexibility Exercises
Exercise number 1. Lie on your stomach and stretch your arms up. Raise your arms and legs at the same time above the floor, bending as much as possible. Keep your knees straight. Hold this position for 30-60 seconds, lower yourself, relax your body. Repeat several times.
Exercise number 2. Lie on your back with your knees bent and your arms extended along your body. Raise your pelvis as high as possible, after 5 seconds, gently lower yourself onto your back.
Exercise number 3. Get on your knees, place your feet hip-width apart at a right angle to the floor. Slowly arching your back and arching your head back, reach your heels with your hands.
Exercise number 4. Lie on your stomach and, having risen and bent over, grab your ankles with your hands. Raising your head, chest and legs, bend further. Stay in this position for a few seconds.
Exercise number 5. Try to make a "bridge" on the fitball. Lie on your back on a gymnastic ball, put your feet shoulder-width apart and try to reach the floor with your hands.
Exercise number 6. Lie on your stomach, with straight arms lean on the floor at hip level. Now, bending your knees, arch your back, trying to press your head to your heels. Fix the position for 30 seconds.
How to make a "bridge" from a prone position
Lie on your back. Next, bend your legs and arms, placing your hands close to your shoulders and pointing your elbows up. Straightening your arms, legs and bending in the lower back, try to stand on the “bridge” from this position. At the moment when you feel that you can’t bend further, linger in this “limiting” position for you for a couple of seconds.
When the exercise becomes good, you can make it more difficult by moving your hands as close to your legs as possible. You can also swing back and forth in the “bridge” position.
How to get on the "bridge" from a standing position
Try to do flexibility exercises daily. When you are good at getting up on the gymnastic "bridge" from a prone position and linger in this position, try to stand on the "bridge" from a standing position. Use for this Swedish wall or free space near the wall.
Stand with your back to the wall at a distance of about one step, put your feet shoulder-width apart, raise your hands up. Lean back from this position until you rest your hands on the wall. Lean further, moving your fingers along the wall or steps of the Swedish wall until you lower yourself to the “bridge” position. Hold for a while in this position, then return to the starting position, moving your hands along the wall in the same way. Practice doing this exercise until you get it right.
Getting up on the “bridge” from a standing position without the help of a wall is most correct on a gymnastic mat. At first, it is advisable to use the help of someone who will insure you. Stand facing this person with your feet shoulder-width apart, raise your arms up and lean back. Your assistant can secure you by supporting you under your back. Hold in the “bridge” position and, pushing off with your hands, return to the starting position.
The bridge is a basic exercise that serves as the basis for the most difficult gymnastic tricks. The ability to perform it is an indicator of good physical shape. After all, in order to do this, you need not only to have certain skills, but also to have a solid muscle corset. But not everyone knows how to properly stand on the bridge. This is a rather difficult exercise, and with an illiterate approach, it can be unsafe. Consider all the stages of preparation for it and its correct execution.
Exercises to warm up the joints and spinal muscles
An unprepared person should not try to immediately stand on the bridge. At best, you can damage unheated ligaments and muscles, and at worst, you can get more dangerous injuries, up to the set of exercises given here will help you prepare for this difficult trick:

How to get on the bridge from a prone position
To do this exercise from a standing position is much more difficult than from a prone position. In this case, it will be more traumatic. Therefore, before giving an answer to the question of how to learn how to stand on the bridge while standing, let's try to understand how to do it from a prone position on the floor. To do this, we need a soft gymnastic mat or a small insurance mat. If there is neither one nor the other, you can just take a blanket folded four times. We lay down on it with our backs, bend our legs at the knees and put them shoulder-width apart. We raise our hands up and take them back. Then we bend them at the elbows and lean on the palms, placing them next to the head. Gently straighten your arms and legs, bending your back. We fix this position for a few seconds. We return to the starting position. With each new approach, we try to fix for a longer time.
How to get on the bridge while standing

To perform this exercise, you will need not only a soft mat, but also Well, of course, a little patience and effort on your part. After reading this chapter, you will learn how to quickly get on the bridge from a standing position. If there is no Swedish wall, you can use a regular wall. We do everything slowly and carefully, without sudden movements. We stand with our backs to the Swedish wall, we keep our legs shoulder-width apart. We raise our hands up. Lean back and lean against the wall. Then, carefully fingering her slats, we go lower. And so we do until we touch the floor. After that, we return to the starting position in the same way, along the wall rails. You need to perform this exercise several times. Getting up on the bridge from a standing position for the first time will help a soft mat or blanket and a coach or just some person who will insure you. We stand up straight. We raise our hands up. The legs at this time are shoulder width apart. For the first time, you can increase the distance between them to maintain balance. Then we lean back with our hands raised up until we touch the floor with them. The coach all this time should insure you, supporting you behind your back. Before you decide to do the trick yourself, you need to clearly learn how to do it with an assistant.
Bridge for advanced

You can make this exercise more difficult. But only “pros” who have already mastered the trick from a standing position should do this. Now we will learn how to learn how to get up on the bridge from the vertical Do not try to perform it if you are not in very good physical shape. The trick requires not only a great concentration of attention, but also an excellent state of the vestibular apparatus. So, we stand on our hands, we raise our legs up. We bend them at the knees and begin to smoothly and carefully lower them down from the back, maintaining balance. As soon as they touch the floor, you need to distribute the load evenly between them and your hands.
Common Mistakes
The first and most common misstep when performing a trick is that people go to the "bridge" with their backs and shoulders. And you need to do this only with the help of hands. This is most likely due to the fear of falling. You don't need to be afraid. After all, your muscles are well warmed up and ready to perform such a difficult trick. A soft mat will insure in case of a fall. The second mistake people make when trying to learn how to do a bridge and trying to do it on their own is doing the trick with their back, without distributing the load on their hands. The result is a lopsided and unstable bridge. It will be correct to rely on hands in the process of execution.
The Benefits of Exercise

All exercises that serve to prepare for the implementation of the bridge, well strengthen the muscles of the back. It is important. It's no secret that our spine is subjected to intense physical stress every day. He can withstand it only if strong muscles support him. Regular performance of the “bridge” trick will help not only to form a good muscular dorsal corset, but also develop the flexibility of the spinal joints. This is especially important for older people. After all, over the years, our bones lose calcium, become more fragile. And the joints, on the contrary, accumulate harmful salts, which help to reduce their mobility. As a result of all this - a hunched back, constant pain and the inability to straighten the shoulders. Regular performance of these exercises will allow you to stay in excellent physical shape at any age.
The article will be useful to a wide range of readers. Especially for those who want to learn how to stand on the bridge and what exercises can be used to strengthen the back muscles.